...

Tag Skimming Walls and Ceilings

Skimming Plaster

Skimming Plaster Guide and Common Questions

The Art of Skimming Plaster for Smooth Walls: Guide and Common Questions

When it comes to achieving a flawless finish on your walls, skimming plaster is an essential technique. Whether you’re renovating an old home, repairing damaged walls, or simply seeking that sleek, modern look, skimming can transform rough, uneven surfaces into smooth canvases ready for painting or wallpapering. so In this blog post, we’ll delve into the art of skimming plaster, covering everything from its purpose to the step-by-step process and tips for achieving the best results.


What is Skimming Plaster?

Skimming plaster is the process of applying a thin layer of plaster over an existing surface to create a smooth, even finish. It is commonly used to refresh walls and ceilings, covering up imperfections and providing a pristine surface ready for painting or wallpapering.


Why Skim Plaster?

  1. Aesthetic Appeal: Skimming provides a smooth, even finish that enhances the look of your walls and ceilings.
  2. Preparation for Painting/Wallpapering: A smooth surface is essential for achieving a professional finish with paint or wallpaper.
  3. Repair and Maintenance: Skimming can repair damaged or uneven walls, covering cracks, holes, and other imperfections.
  4. Increased Property Value: Well-finished walls can improve the overall appearance of your home, potentially increasing its market value.

Materials Needed to Skim a Room

To skim a room, you need the following materials:

  • Multi-Finish Plaster: The primary material for skimming, known for its smooth finish.
  • PVA Glue: Used to prime the walls and ensure better adhesion of the plaster.
  • Scrim Tape: Applied over joints and cracks to prevent them from showing through the plaster.
  • Angle Beads: Used to reinforce and shape corners and edges around windows and doors.

These materials work together to create a smooth, durable, and aesthetically pleasing finish, making skimming plaster a preferred method for wall and ceiling preparation in both residential and commercial properties.


Tools and Materials You’ll Need

  • Plaster mix (either ready-mixed or powder)
  • Mixing bucket and drill with a mixing paddle (if using powder plaster)
  • Plastering trowel
  • Hawk (a flat board with a handle for holding plaster)
  • Jointing knife or filling knife
  • Sandpaper or sanding block
  • Clean water
  • Dust sheets and protective gear (gloves, mask, goggles)

Step-by-Step Guide to Skimming Plaster

Preparation

Protect the Area:
Cover floors and furniture with dust sheets. Wear protective gear to keep plaster dust and debris at bay.

Clean the Surface:
Ensure the wall is clean, dry, and free from loose materials. Remove any flaking paint or wallpaper.

Prime the Surface:
Apply a PVA (polyvinyl acetate) primer to the wall to ensure the plaster adheres properly. Mix the PVA with water (usually in a 1:4 ratio) and apply with a brush or roller.

Mixing the Plaster

For powdered plaster:

  1. Fill your bucket with the recommended amount of water.
  2. Gradually add the plaster powder, mixing continuously with a drill and paddle until you achieve a creamy consistency.
  3. Allow the mix to stand for a few minutes, then remix to eliminate lumps.

Applying the First Coat

  1. Load your hawk with plaster.
  2. Using the plastering trowel, scoop a small amount of plaster and apply it to the wall in a thin, even layer.
  3. Start at the top of the wall and work your way down, spreading the plaster in smooth, sweeping motions.
  4. Aim for a coat about 2-3mm thick. Don’t worry if it’s not perfect at this stage; you can smooth it out later.

Smoothing the Surface

  1. Once the first coat is applied, allow it to set slightly but not completely dry (usually 10-15 minutes).
  2. Go over the surface with a clean, damp trowel, applying gentle pressure to smooth out any ridges or high spots.

Applying the Second Coat

  1. Apply a second, thinner coat of plaster (about 1-2mm thick) to fill in any imperfections and achieve a smoother finish.
  2. Use the same technique as the first coat, working systematically from top to bottom.

Final Smoothing and Polishing

  1. Allow the plaster to firm up but not fully harden.
  2. Use a clean trowel to smooth out the surface further, applying water sparingly if needed to help with smoothing.
  3. For a polished finish, lightly mist the surface with water and use the trowel to achieve a glass-like sheen.

So By following these steps, you can achieve a professional, smooth finish on your walls, ready for painting or wallpapering. Happy plastering!


Tips for Success

  • Work Quickly: Plaster sets rapidly, so work efficiently to apply and smooth it before it hardens.
  • Keep Tools Clean: Clean your tools regularly to avoid dried plaster lumps spoiling your work.
  • Practice Makes Perfect: If you’re new to skimming, practice on a small area or a piece of plasterboard before tackling larger projects.

Common Questions About Skimming Plaster

How to Skim a Wall?

  • Preparation: Clean the wall, apply a coat of PVA glue, and let it become tacky.
  • Apply Scrim Tape and Angle Beads: Cover any joints or cracks and fix angle beads to corners.
  • Mix the Plaster: Mix Multi-Finish Plaster with clean water to a smooth consistency.
  • Apply the Plaster: Use a plastering trowel and hawk to apply a thin, even layer of plaster from top to bottom.
  • Smooth the Surface: Once the plaster begins to set, smooth out any lines or imperfections with a plasterer’s float.
  • Finish: Lightly mist with water and smooth again for a perfect finish. Allow to dry completely before painting or wallpapering.

What Tool Do You Use to Skim?

  • Plastering Trowel: The main tool for applying and smoothing the plaster.
  • Hawk: A flat, square tool used to hold the plaster while you work.
  • Mixing Bucket: For mixing plaster with water.
  • Drill and Paddle Mixer: To mix the plaster to a smooth consistency.
  • Plasterer’s Float: For smoothing the plaster once applied to the wall.
  • Brush: For applying PVA glue.
  • Jointing Knife: For filling gaps or cracks before skimming.
  • Water Spray Bottle: To keep the plaster moist.
  • Snips: For cutting angle beads.

Is Skimming Cheaper Than Plastering?

Skimming can be more cost-effective than full plastering, depending on the condition of the existing walls and the scope of the project. Skimming involves applying a thin layer of plaster over existing surfaces, which requires less material and less time compared to a full plastering job. However, the final cost depends on factors such as the size of the area, the condition of the surfaces, and labor rates.

Can You Just Skim Over Old Plaster or Paint?

Yes, you can skim over old plaster as long as the existing plaster is in good condition. Clean the surface, apply PVA glue, fix any cracks with scrim tape, and then apply the new plaster.

How Many Coats to Skim a Wall?

Skimming a wall is typically done in a single coat, about 2-3mm thick. However, a second coat might be necessary if the first coat doesn’t provide a satisfactory finish or if there are significant imperfections.

Do You Need to PVA Before Skimming?

Yes, applying PVA glue before skimming is essential. PVA helps the new plaster adhere better to the existing surface, preventing it from drying too quickly and cracking. Mix the PVA with water, apply it to the surface, and let it become tacky before applying the plaster.

How Long for Skimming to Dry Before Painting?

Skimmed plaster typically takes about 2-3 days to dry completely before painting, depending on the room temperature and humidity. Ensure proper ventilation and avoid using direct heat sources. The plaster should be completely dry to the touch and have a uniform pale color before painting. Apply a mist coat before the top coats of paint.

How Much to Replaster a 3-Bed House?

The cost to replaster a 3-bed house in the UK can range from £3,000 to £5,000. This estimate includes surface preparation, materials, labor, and additional costs for necessary repairs.

How Many m² Can a Plasterer Skim in a Day?

On average, a skilled plasterer can skim between 50 to 70 square meters in a day under ideal conditions. The amount depends on experience, the complexity of the job, and the condition of the surface.

What is the Day Rate for Plasterers in London, UK?

The day rate for plasterers in London ranges from £150 to £250, depending on experience, reputation, and the complexity of the job. Rates can be higher for larger or more specialized projects.

How Long for Skimming to Dry Before Painting?

Skimmed plaster typically takes about 2-3 days to dry completely before painting, depending on the room temperature and humidity. Here are some tips to ensure proper drying:

  1. Ventilation: Keep the room well-ventilated to speed up the drying process. Open windows and use fans if necessary.
  2. Avoid Heat: Avoid using direct heat sources like heaters, as they can cause the plaster to dry too quickly and crack. Natural drying is best.
  3. Check for Dryness: The plaster should be completely dry to the touch and have a uniform pale color before painting. Any remaining dark patches indicate that the plaster is still wet.

Before painting, apply a mist coat (a watered-down paint mixture) to seal the plaster. This helps the top coats of paint adhere better and ensures an even finish.

How Much to Replaster a 3-Bed House?

The cost to replaster a 3-bed house in the UK can vary significantly based on the size of the house, the extent of the work needed, and regional labor rates. On average, the cost to replaster a 3-bed house ranges from £3,000 to £5,000. This estimate includes the following factors:

  1. Surface Preparation: Removing old plaster, cleaning, and applying PVA glue.
  2. Materials: The cost of plaster, PVA glue, scrim tape, and angle beads.
  3. Labor: The time and skill required to apply the plaster, typically charged at a day rate.
  4. Additional Costs: Any necessary repairs to the underlying structure, such as fixing cracks or replacing damaged plasterboard.

For an accurate estimate, it’s best to get quotes from multiple plasterers and discuss the specific requirements of your project.


Conclusion

Mastering the art of skimming plaster can significantly enhance the quality and appearance of your walls. With the right tools, materials, and techniques, you can achieve a smooth, professional finish that sets the perfect foundation for your home decor. Whether you’re a DIY enthusiast or a seasoned professional, adding skimming plaster to your skill set is invaluable. Enjoy your plastering journey!

Moreover, understanding the basics of skimming plaster is key to achieving great results, regardless of your experience level. By addressing common questions and employing proven methods, you can confidently approach your plastering projects, ensuring consistently smooth and polished finishes every time.


Ready to Enhance Your Home?

Contact Plastering Services London today for a free consultation and quote. Let us transform your walls and ceilings with our expert plastering services.

📞 Call us at: 07427123200

Follow us on Social Media:


Experience excellence in plastering with Plastering Services London. We deliver superior quality, every time.

Skimming Plaster Guide and Common Questions

Plastering and Skimming North London

North London Plastering & Skimming

Transforming Homes in North London: Expert Plastering & Skimming in NW6

At Plastering Services London, we take pride in delivering exceptional plastering and skimming services across North London. Recently, we had the pleasure of working on a beautiful home in the vibrant NW6 area, bringing our expertise to enhance both its structure and aesthetics.

Project Overview: NW6 Plastering & Skimming

Our recent project in NW6 involved comprehensive plastering and skimming work across a stunning 3-bedroom Victorian house. Here’s a glimpse into how we transformed this property:

The Challenges

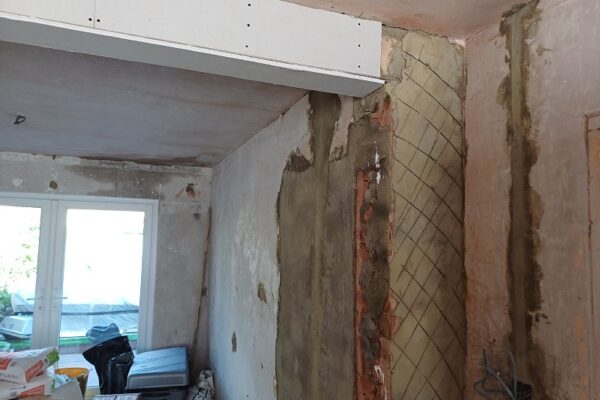
  1. Aging Plaster: The original plaster in the home was over 50 years old, showing signs of significant wear and tear, with cracks and uneven surfaces throughout.
  2. Outdated Finishes: The walls and ceilings had a dated texture that didn’t align with the modern vision the homeowners had for their space.
  3. Structural Repairs: Some areas required minor structural repairs before the plastering work could begin, particularly around window frames and doorways.

Our Approach

  1. Detailed Assessment: We started with a thorough inspection to understand the extent of the wear and to plan the best approach for plastering and skimming.
  2. Preparation: Our team carefully prepared the surfaces, including cleaning, repairing, and priming the existing plaster to ensure a flawless application.
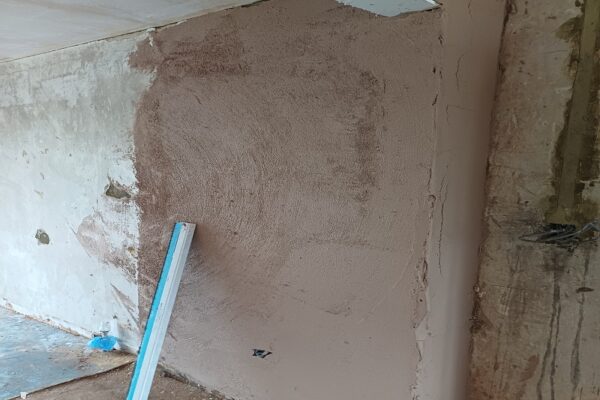
  3. Precision Plastering: We applied new layers of plaster to restore and strengthen the walls, providing a solid, smooth foundation.
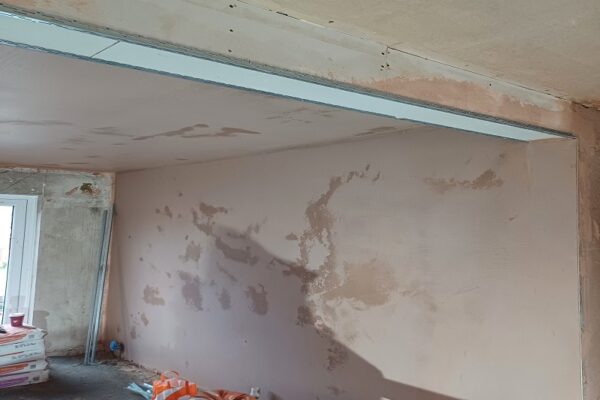
  4. Expert Skimming: To achieve the sleek, modern finish the homeowners desired, we skimmed all the walls and ceilings, ensuring perfectly even surfaces ready for painting.

The Transformation

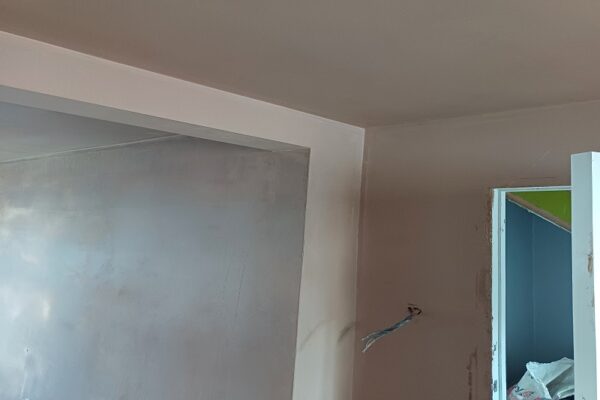
  • Living Room: We transformed the main living area from a tired, cracked space into a bright, inviting room with smooth, seamless walls and a perfectly finished ceiling. The new plastering provided an excellent base for a fresh, contemporary paint job.
  • Bedrooms: Each bedroom in the house received meticulous skimming, removing all traces of old textures and imperfections. The result was clean, modern walls that dramatically improved the ambiance of each room.
  • Hallways and Staircases: We extended our plastering and skimming work to the hallways and staircases, ensuring that every part of the house reflected the same high standard of finish.
  • Ceiling Details: In the dining room, we added a touch of elegance with carefully plastered and skimmed ceilings, highlighting the room’s character while providing a flawless surface.

Customer Satisfaction

The homeowners in NW6 were thrilled with the results. They particularly appreciated our attention to detail and the seamless finish we achieved throughout their home. Here’s what they had to say:

“We couldn’t be happier with the transformation! The team from Plastering Services London did an outstanding job. Our walls and ceilings look brand new, and the whole house feels refreshed and modern. Highly recommend their plastering and skimming services!” – Emma and John R., NW6

Why Choose Us for Your Plastering Needs?

  • Local Expertise: With extensive experience in North London, we understand the unique needs and challenges of homes in the NW6 area.
  • Quality Craftsmanship: Our team is dedicated to delivering high-quality plastering and skimming work that stands the test of time.
  • Professional Service: We pride ourselves on our professionalism, from the initial consultation through to the final clean-up.

Ready to Transform Your Home?

If you’re looking to enhance your home with expert plastering and skimming services, contact us today for a free consultation and quote. Let’s make your North London property shine!

📞 Call us at: 07427123200

🌐 Visit us at: Plastering Services London


Stay connected with us and be part of a community that values quality home improvement. Here’s how you can follow us:


Bringing new life to homes in NW6 with top-tier plastering and skimming services. Quality, precision, and a flawless finish – that’s our promise.

North London Plastering Skimming in NW6

skimmin and plastering

Skimming Walls and Ceilings in London

London’s diverse architectural landscape, ranging from historic Victorian homes to sleek modern apartments, demands high-quality interior finishes. One of the most effective techniques for achieving smooth, flawless walls and ceilings is skimming. This process not only revitalizes tired surfaces but also sets the stage for beautiful paintwork and decorations, making it a popular choice among homeowners and businesses in the capital.

What is Skimming?

Skimming is the application of a thin layer of plaster, typically around 2-3mm thick, over walls or ceilings to create a smooth and even surface. This technique is ideal for covering imperfections such as cracks, dents, and uneven textures, providing a fresh canvas for any interior decor. It can be applied to existing plaster or new plasterboard, making it a versatile solution for both renovation and new construction projects.

Why Skimming is Essential in London

  1. Restoring Historical Charm: Many of London’s older properties feature intricate architectural details and unique character. However, the passage of time often leaves walls and ceilings in need of restoration. Skimming can seamlessly rejuvenate these surfaces, preserving the original charm while preparing them for modern finishes.
  2. Preparing for Modern Aesthetics: In contemporary spaces, a sleek, smooth finish is paramount. Skimming ensures walls and ceilings are perfectly primed for paint or wallpaper, creating the clean lines and polished look that modern designs demand.
  3. Enhancing Property Value: A well-finished interior can significantly boost the appeal and market value of a property. Whether you’re renovating a home for sale or upgrading a commercial space, skimming provides a cost-effective way to enhance the overall appearance and quality.

The Skimming Process

Skimming is a skilled craft that requires precision and expertise. Here’s a step-by-step overview of the process:

  1. Preparation: The surface is thoroughly cleaned and prepped, removing any loose material or debris. If necessary, a bonding agent is applied to ensure proper adhesion of the new plaster layer.
  2. Application: A thin layer of plaster is carefully spread across the surface using specialized trowels. This step requires a steady hand and keen attention to detail to achieve a uniform thickness and smooth finish.
  3. Finishing: Once the plaster begins to set, it’s meticulously smoothed and polished to eliminate any remaining imperfections. The result is a flawless, glass-like surface ready for painting or decoration.
  4. Drying Time: Skimmed walls and ceilings need to dry thoroughly before any further work is done. This process typically takes a few days, depending on the room’s conditions and the plaster type used.

Choosing the Right Professionals in London

Given the precision required, skimming is best left to experienced professionals. When selecting a plastering service in London, consider the following:

  • Reputation and Reviews: Look for companies with strong testimonials and a proven track record in skimming work.
  • Experience: Ensure the team has ample experience with both residential and commercial projects, particularly those similar to your own.
  • Quality of Materials: Verify that they use high-quality plaster and tools, which are crucial for achieving a durable and smooth finish.
  • Customer Service: A good contractor will communicate clearly, provide transparent quotes, and respect your property throughout the project.

The Impact of Skimming

The benefits of skimming extend beyond aesthetics. Smooth walls and ceilings can improve lighting in a room, make maintenance easier, and provide a sense of luxury and refinement. In a bustling and dynamic city like London, where property standards and expectations are high, skimming is an invaluable technique for creating beautiful, enduring interiors.

Whether you’re refreshing a tired room or preparing a new space for its first coat of paint, skimming offers a practical and elegant solution. With skilled craftsmanship and attention to detail, this process can transform any wall or ceiling into a pristine, flawless surface, enhancing the beauty and value of your London property.


Ready to transform your space with our professional plastering services? Whether you need skimming, rendering, Krend application, ceiling or wall repair, contact us today for a free quote!

Visit our website or call us to learn more about our services and how we can help with your next project.

Phone: 07427123200

Address: London – UK

Working Hours:  Mo – Sa : 9am – 10pm

Our Website: Plastering Services London

Follow Us on Social Media

Stay connected and updated with our latest projects and offers by following us on social media:

Skimming Walls and Ceilings